

If you are reading this, you most probably already know that the iTunes era is officially over: Apple released new MacOS Catalina (version 10.15) without iTunes. Instead, music, video and podcasts now have their own dedicated applications, and Finder handles backups and syncing.
But why did Apple decide to remove iTunes?
After nearly two decades, Apple decided to axe iTunes in favor of Apple Music, explaining that the application’s lost its initial purpose and the performance has gotten laggy. It was calling for redistribution of tasks to separate applications.
iTunes has turned into this bulky cross-platform multi-purpose application that did quite a lot in addition to just burning and playing songs on Mac, as it was planned at first. Apple software boss Craig Federighi, even made a joke about iTunes only lacking a calendar and email management system, with how multitasking and busy it was.
Is my iTunes collection now lost?
Nothing is lost! The bottom line with this change from Apple, is not liquidation as it may seem, but actually reorganization and optimization. Everything you’ve had prior to upgrading from your current Mac OS to Catalina, is here to stay, just not within iTunes — each filetype in its own little place.
All your iTunes purchases, imports, uploads and rips from CDs are available within separate applications: Apple Music, Apple TV, Apple Podcasts, and Apple Books. Even without iTunes, on MacOS Catalina you are provided with a catalog of over 5 million songs (all at your hand within the Apple Music app), along with collections of music videos (within Apple TV) and podcasts (Apple Podcasts).
Do I need to back up before upgrading to MacOS Catalina?
Apple actively assures that there is no need, but you know you cannot be too careful. 4K Download team definitely encourages this step that might seem extra now, but could save from a whole lot of trouble in case something does go wrong.
How to back up my iTunes library?
The important thing is to download your library (or at least the files you want to backup) to your computer. After doing that, follow the steps below.
-
Connect an external storage device to your Mac computer.
-
At the appeared window, check the box that says Encrypt Backup Disk, then click Use as Backup Disk to select the storage device as your backup disk.

If Time Machine doesn’t ask you about the device’s usage, follow the recommendations from Apple .
-
That’s it! Time Machine should automatically start creating a backup. It may take a while the first time, depending on the size of your library, but you can continue using your Mac for other tasks in the meantime.

If you are a PC owner, follow this official Apple instruction on how to back up and restore iTunes library.
Do I have to subscribe to Apple Music to listen to my library?
Apple Music offers different subscription plans for unlimited music streaming, but the subscription it’s not obligatory to obtain. The Apple Music application serves merely as a music player for you, and your already existing library is enough — no additional payments required.
Do 4K Download applications still support direct file download to iTunes?
4K Download products that used to have the direct iTunes file transfer feature (4K Video Downloader and 4K YouTube to MP3) no longer it. Since we update the applications to the latest OS changes and due to Apple discontinuing iTunes for MacOS Catalina and all following versions, we removed the iTunes feature from our products.
How to transfer files on MacOS Catalina without iTunes?
If you are subscribed to Apple Music, the application will automatically populate your iCloud Drive library, given you are signed in to Apple ID within System Preferences > Apple ID.
You can also transfer files between your iPhone and other nearby Apple devices with AirDrop, send files via email attachments, and of course connect devices to your computer through USB and WiFi connection.
Before we move to the steps to transfer your files, we want to get one thing out of the way.
Once you run the Apple Music application after upgrading to MacOS Catalina, you might wonder where the iTunes store located now. If you don’t see it at the sidebar of Apple Music, here is how to find the iTunes store manually:
-
Run the Apple Music application.
-
Find the menu bar, choose Music > Preferences.
-
Head to the General tab and select iTunes Store.
-
Click OK.
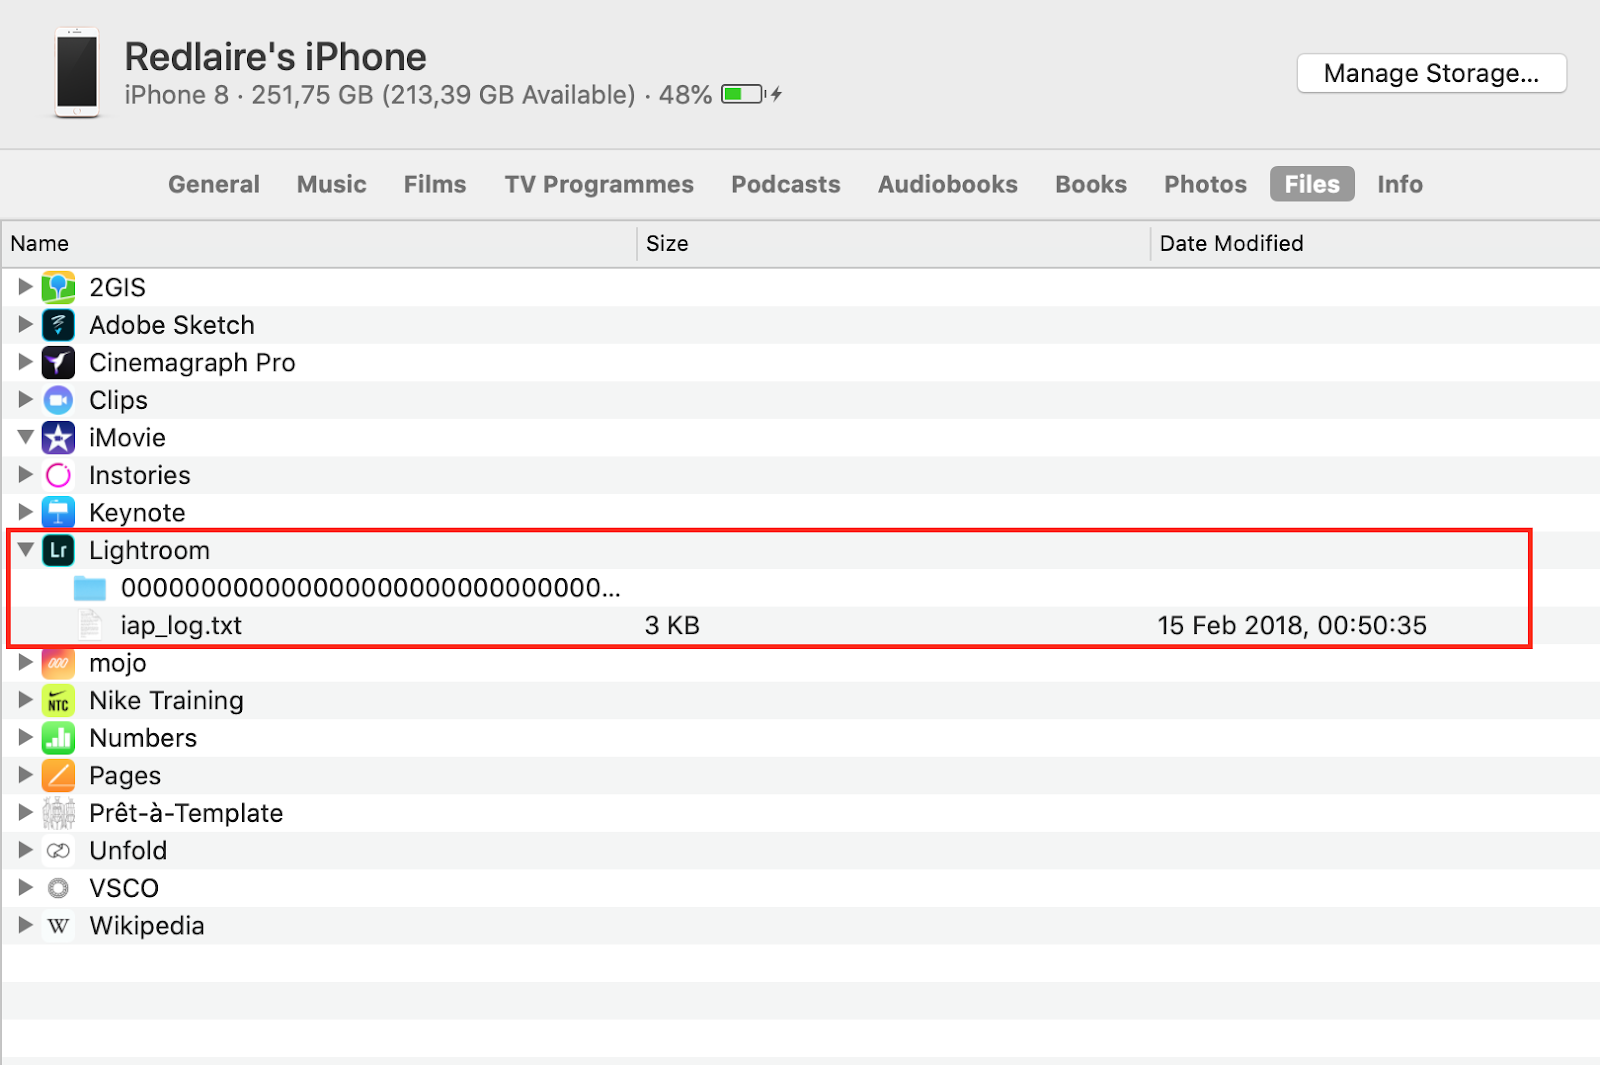
How to transfer files from Mac to iPhone/iPad?
-
Connect iPhone/iPad to your Mac.
-
Click the Finder menu bar, select your iPhone or iPad.
-
At the top of the Finder window, click Files.
-
Drag one or several files from a Finder window onto an app name in the list.


How to transfer files from iPhone/iPad to Mac?
-
Connect iPhone/iPad to your Mac.
-
Click the Finder menu bar, select your iPhone or iPad.
-
At the top of the Finder window, click Files.
-
Click the disclosure triangle beside an app name to see the files on your iPhone
-
Drag one or several files to a Finder window.


How to transfer files from Windows PC to iPhone/iPad?
-
Connect iPhone/iPad to your Windows computer.
-
iTunes is still available on Windows, so you can transfer files using the application. Open it on your PC.
-
Click the iPhone/iPad button near the top left of the iTunes window.
-
Click File Sharing and select an app from the list.
-
Click Add.
-
Select one or several files you want to transfer, then click Add.
How to transfer files from iPhone/iPad to Windows PC?
-
Connect iPhone/iPad to your Windows computer.
-
iTunes is still available on Windows (and pre-Catalina MacOS versions), so you can transfer files using the application. Open it on your PC.
-
Click the iPhone/iPad button near the top left of the iTunes window.
-
Click File Sharing and select an app from the list.
-
Select one or several files you want to transfer in the list on the right, click Save to.
-
Select the location where you want to save the file, then click Save To.
All of the instructions given above can be used for transfer of files you downloaded with our products, 4K YouTube to MP3 and 4K Video Downloader , as well as other files you have on your Mac and PC from other sources.
 SHARE ON TWITTER


Thanks for feedback
Your comments will appear here shortly. Please spread the word about us in social networks.