


Instagram remains a leading platform for sharing visual content; however, achieving high-quality photo uploads can often be daunting (or even impossible at times), leaving many of us frustrated with the final result. Blurred images, distorted colours, and loss of detail can diminish the impact of otherwise stunning photographs.
This guide is here to help, as we aim to provide practical solutions to the common problems faced when uploading photos to Instagram, ensuring that your images maintain their integrity and visual appeal. So, whether you're a professional photographer, an avid hobbyist, or simply someone who enjoys sharing life's moments with friends and followers, this guide will help you optimise your Instagram uploads for maximum quality.
Does Instagram Make Images' Quality Worse After They're Uploaded?
Yes, Instagram indeed applies compression algorithms to images uploaded to its platform. They do it to reduce file sizes and optimise loading times, particularly for users with slower internet connections or limited data plans. As a result, the quality of uploaded images can be slightly diminished compared to the original files.
Instagram's compression algorithms aim to strike a balance between maintaining image quality and optimising file sizes for efficient delivery across its platform. While this compression may result in some loss of detail or clarity, the impact is often minimal and may vary depending on factors such as the resolution of the original image and the specific compression settings applied by Instagram. Compression can also affect the colours in an image, leading to shifts in hue, saturation, and brightness. Vibrant colours may appear duller, and subtle colour variations may be lost.
Instagram may resize images during compression to fit its display requirements, further reducing their resolution and overall quality. This can be particularly noticeable when viewing images on larger screens or high-resolution devices. The way Instagram applies compression may vary depending on factors such as device type, screen resolution, and internet connection speed. As a result, images may appear differently to users on different devices, leading to inconsistencies in image quality.
To mitigate the effects of compression, you might need to optimise your images before uploading them to Instagram. In other words, you’ll need to ensure that images are correctly sized, using the appropriate file formats, and making any necessary adjustments to enhance clarity and visual appeal. By taking these steps, you can help maximise the quality of your images on Instagram's platform.
How to Fix Instagram Compression Before Uploading It on Instagram
To minimise the impact of Instagram's compression on your uploaded images, you can take several steps to optimise your photos before uploading them to the platform. Here they are.
Start with High-Quality Images
Begin with the highest quality image possible. Use a high-resolution camera or select the highest quality setting on your smartphone to capture your photos.
Tip: On Instagram, you can select to upload an image at high resolution. Here’s how:
-
Open the Instagram app and go to your profile page.
-
Tap the menu icon from the top right and select Settings and privacy.
-
Scroll down and tap Media quality.
-
Turn on the switch for ‘Upload at highest quality.
From now on, the Instagram app will always upload photos and videos in the highest quality, even if it takes longer to upload.
Resize and Crop Appropriately
Instagram recommends uploading images with a resolution of at least 1080 pixels wide. Before uploading, ensure your images are correctly sized and cropped to fit Instagram's aspect ratios (1.91:1 for landscape, 4:5 for portrait, and 1:1 for square).
We’ve made a dedicated guide to Instagram images’ sizes, so check it out for more details.
Choose the Right File Format
Instagram supports JPEG and PNG file formats. While JPEG is the most commonly used format for photographs, PNG can be preferable for images with transparent backgrounds or crisp lines. Experiment with both formats to see which works best for your images.
Optimise Compression Settings
Use photo editing software to adjust the compression settings of your images before uploading them to Instagram. Aim to find a balance between file size and image quality. Avoid excessive compression, as it can lead to loss of detail and clarity. We'll touch on one of such tools below.
Use Editing Tools Wisely
Instagram offers a range of editing tools within its app, including options for adjusting brightness, contrast, saturation, and sharpness. Make use of these tools to enhance your images before uploading them. However, be cautious not to over-edit, as this can exacerbate the effects of compression.
Consider Third-Party Apps
There are several third-party apps available that specialise in optimising images for Instagram, one of such is 4K Image Compressor. This app provides additional features and controls for fine-tuning image quality and compression settings.
How to Optimise an Image for Instagram with 4K Image Compressor
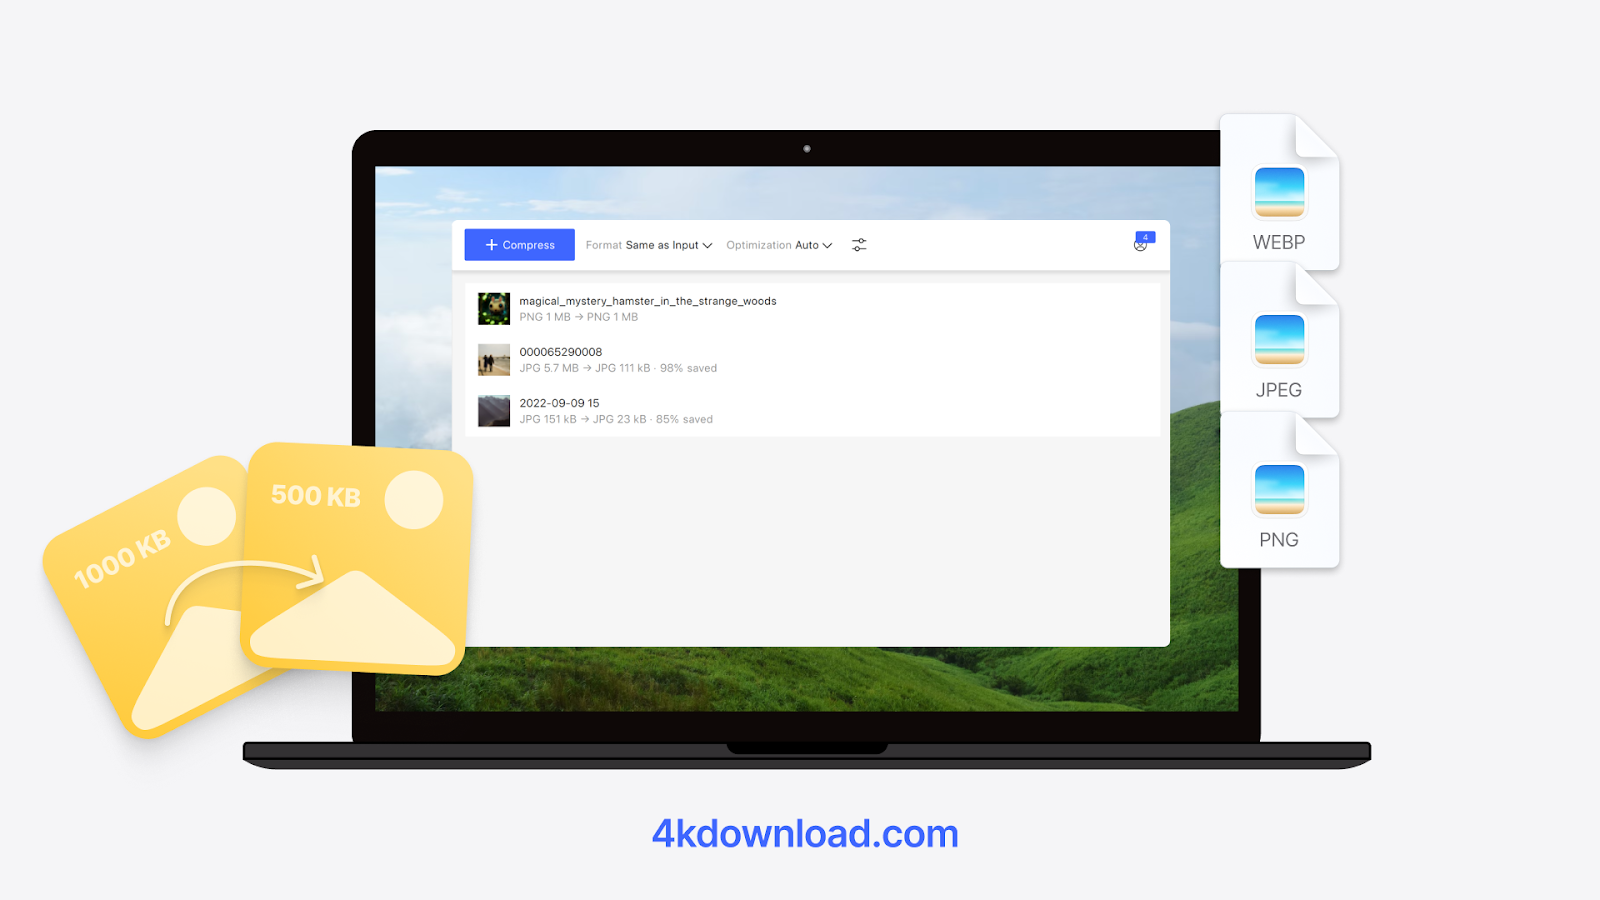
Whether it’s a PNG, WEBP, JPEG, or HEIC image, you can optimise it with 4K Image Compressor before uploading to Instagram. This desktop application for Windows, macOS, and Ubuntu can easily optimise any photo without quality loss. If you need to have multiple images optimised, you can do that with the batch compression feature of the tool.
Here’s how to use 4K Image Compressor to optimise an image for Instagram:
1. Launch 4K Image Compressor. It’s available for Windows, macOS, and Linux.
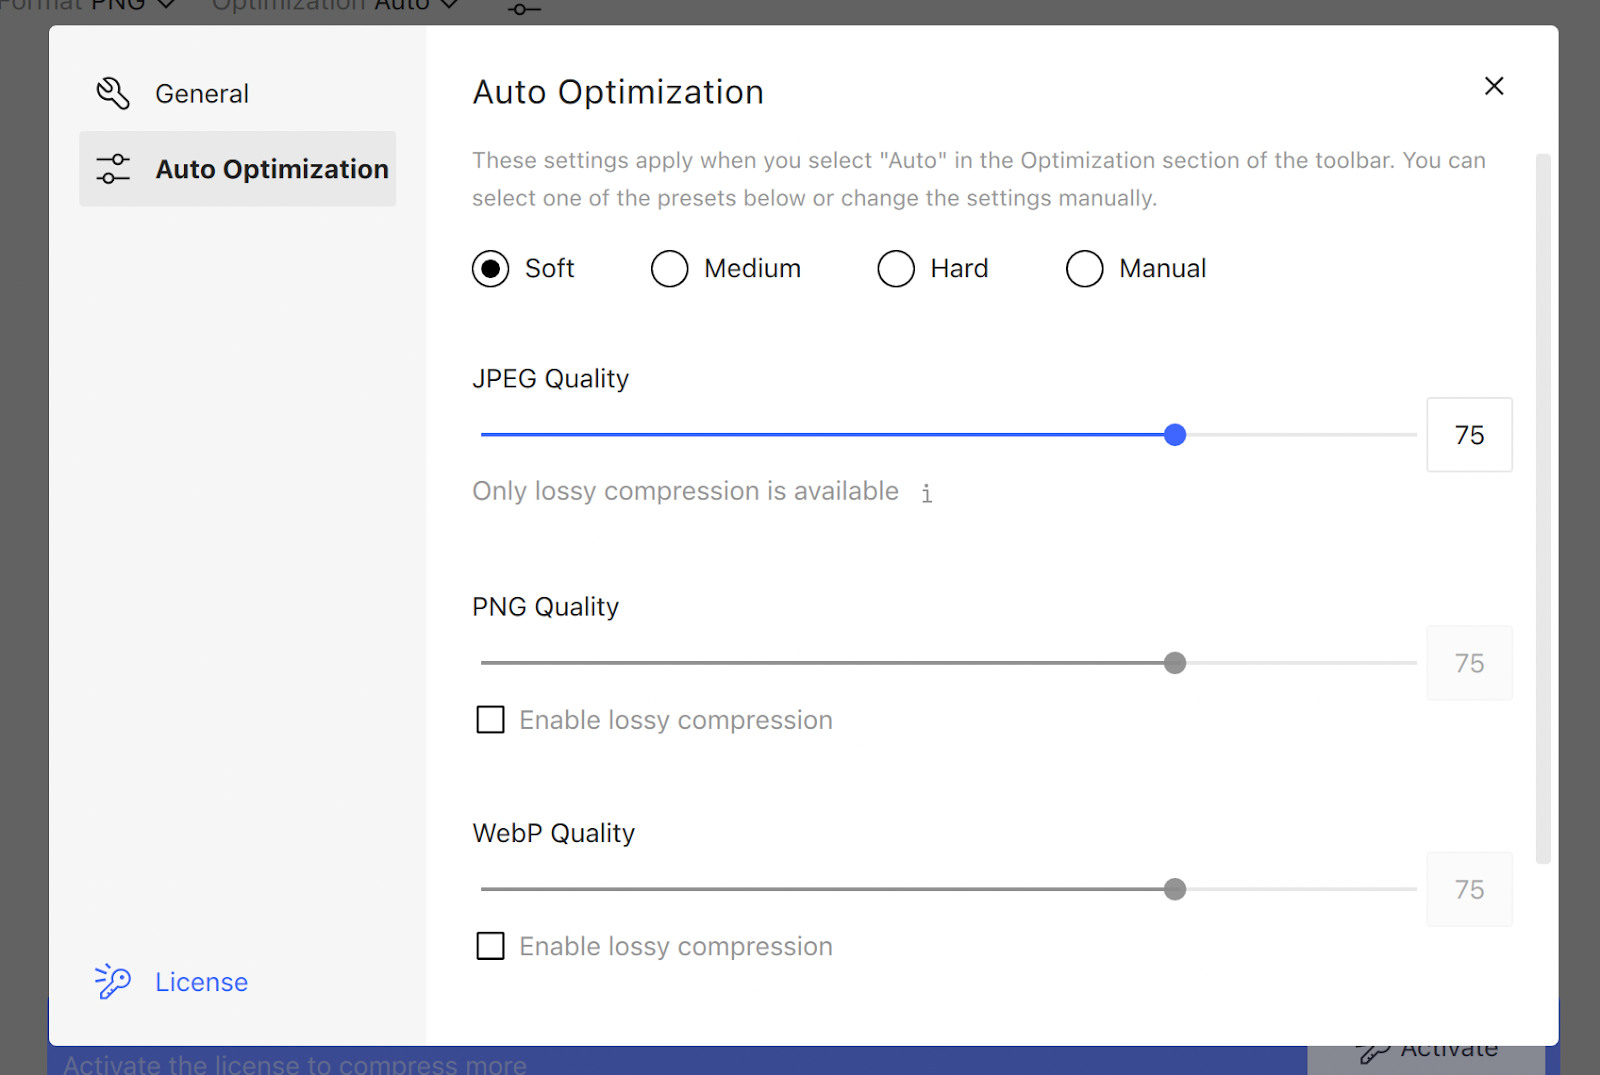
2. Select the output format and optimisation way in the settings bar.
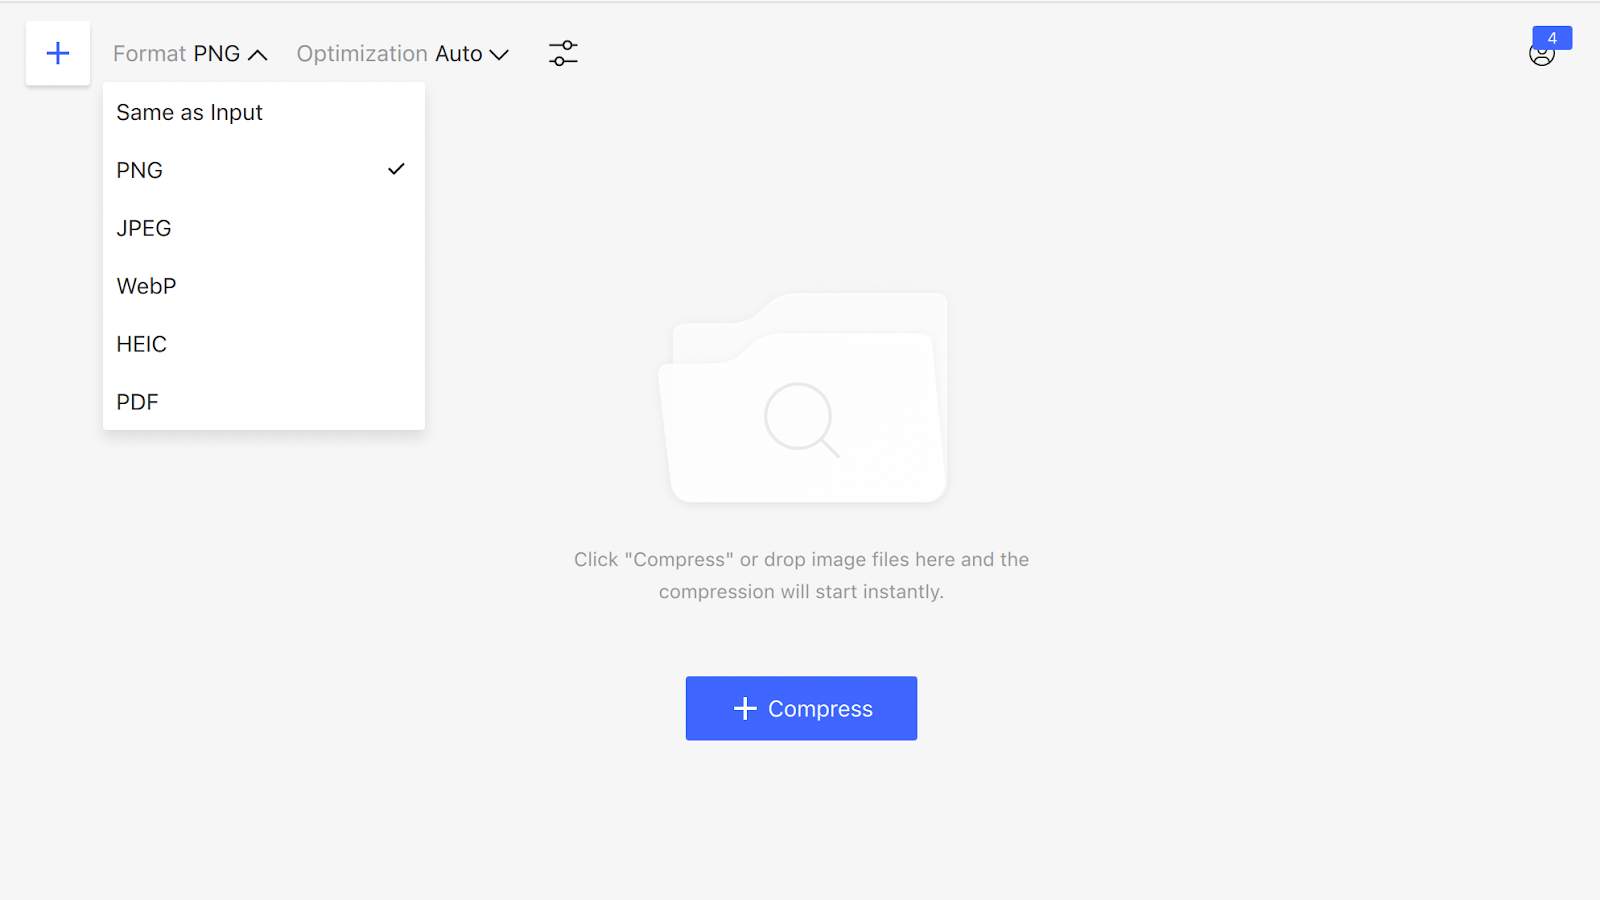
3. If you selected the Percent value, enter the number of percents you want to compress the file by. If you selected the Size value, enter the number and unit (B, KB, MB).
You can also opt for Auto compression and/or choose the optimisation settings within it.
4. Click the Compress button located in the middle of the application window.
5. In the opened window, select the image for compression and click Open.
Your JPEG will be immediately uploaded and compressed.
Hover the cursor over the compressed image preview and click the folder icon to find the file on your computer.

Published Feb. 19, 2024
 SHARE ON TWITTER


Thanks for feedback
Your comments will appear here shortly. Please spread the word about us in social networks.